29.11.15

Family Photo-shoot 2015 | Lifestyle

Hello guys! Happy thanksgivings weekend to all my American readers, I’m so thankful for each and every one of you reading this from any part of the world. All of you have impacted my life in a positive way and I’m so grateful to have your never ending support in everything I do. This year has been amazing. I’m thankful for all the travelling I got to do. So blessed to have my family and friends by my side to support me throughout. Thankful for my older brother who is always there for me. It's bitter sweet that he moved to San Diego yesterday for a new exciting job opportunity. I’m going to miss him driving me places and spoiling me but I will see him for Christmas. I finally got my driving licenses on 23rd of November and I’m so happy about it. I enjoy driving my brother’s car everywhere. I feel so much more independent to drive myself. 
This year we had a small thanksgiving dinner at our place. Then I went shopping with cousins and I came home at 2:30 am I know it’s crazy but last year was even worse; I came home at 4 am. I did bunch of shopping online too. Look out for my black Friday in store and online shopping hauls in just few weeks.  On Friday we went out to the mall for family portraits for year 2015 as my brother left to Cali on Saturday. Down below I have shared few of my favorite pictures. This is the first time I’m sharing more about my family with you guys and introducing my parents and brother in this post. We kept a theme of winter colors for our shoot. I loved how the pictures turned out. Do let me know how you guys like them. 
UPDATES
Few quick updates, I will be posting few more post during my birthday week. So keep on look for them on my blog and Instagram. Starting tomorrow my finals start so I might not be much active on social media. I even have 3 exams on my birthday but I will try best to keep you guys updated. Do let me know what you would like me to post on my blog during the birthday week. Things like what I do, what I wear, what I get. Leave me comments below and let me know. Also look out for black Friday shopping hauls on blog in coming Sundays. Plus, lots of Royal blues will make their way to my blog as we start my favorite month and festive holiday season.


What I wore for the family photo-shoot a royal blue a line dress from Lord & Taylors. Black & gold statement necklace from Forever 21, similar earrings to match the dress also from forever 21, Gold chain bracelet from H&M, two thumb rings from Lauren Conrad's collection. I did a peachy makeup look with a raspberry lip shade from Makeup forever and just blow dried my hair.


November has been pretty neat! I can’t wait for the month of December to unfold. Let’s make the last month of 2015 the most memorable one. Until Next time keep hustling for your dreams. Xo,Jessi.

22.11.15

Lace with grace 2 looks | Fashion

Everyday isn’t about the glam look. I’m so grateful for that! As I enjoy dressing up, I turn my everyday causal outfits into splendid looks by adding a little bit of edge and classic element to it. There are days where I have various different events to attend, but I’m just not too sure of what to wear. I know we all have been in that position. I have finally found a solution for that. Lace dresses are the way to fix that. Everyone can look good in them. That is why we see some kind of lace pattern or design is used in almost every bridal dresses. Lace by itself adds a very elegant touch to a garment. I personally feel that anything lace looks very flattering. I would opt for anything lace for days when I’m unsure.
            In this post today, I will be sharing two looks with you guys. My first look is what I like to call shades of grey. This beautiful Body Con dress sole my heart in just one look. I personally think grey is not my color but, I do like to experiment with colors so, I brought this dress anyway. I’m so happy with my purchase. This dress has different lace patterns covering the entire dress from top to bottom. I love that the color fades from light grey to ash grey at the bottom. I feel that the layers of colors add more definition to the lace details. This dress also has stunning shaped back and neck line. I would wear this dress for a night out or for evening party. With Glam makeup look with winged liner.
How I styled the dress
1.      Wore grey heels with sliver sparkle in the front.
2.      Sliver statement necklace.
3.      Pandora bracelet.
4.      Little diamond studs.
5.      Lose curls on one side.


Shades of grey | Look one


I am wearing sliver designer heels from Dolce & Gabbana, Body Con dress 
from Dry Goods USA , necklace from J.Crew , Bracelet Pandora.(click on the
names of brands to get more details about my outfit including the price & similar
products.


Look two which I’m considering wearing for thanksgiving party this year. If I end up wearing something else I will make a blog post next week. My mom helped me to pick this dress. I’m so happy that we had a similar choice for dress. Black everything is my favorite so, I had to pick this black lace dress. This dress is short and fitted at the bottom and has a split open back. I feel this dress gives illusion of skirt and top as two complementary colors are used to make this stunning one piece. I would wear this dress to almost any event, whether it’s, wedding, party, dinner date, or even church. This dress is a very classic piece. I’m glad I have it in my collection.
How I styled the dress
1.      Black pencil heels.
2.      Gold chain bracelet.
3.      Red lip. Lipstick in color Cherry Frost in shade number 539A.  
4.      Fishtail braid on one side.

Lace is the new black| Look two

Black heels from Jcpenny's, lace dress from Forever 21, gold chain bracelet from  H&M 
(Click on the brands to see the outfit details and price.)

Hope you all liked this post. So now onwards feel free to wear lace dresses and carry them with grace. Until next time, keep hustling for your dreams. Much love, Jessi

15.11.15

Slutty Brownies | Baking

          I’m back with one more baking post. As you guys seem to really enjoy the Halloween spooky cake post. During this time of the year I crave to eat sweet treats. For me it all starts from autumn treats, pumpkin pies & Halloween candies. Now as thanksgiving is coming up in just two weeks. I thought of baking something special for my family & friends. So I thought of making some brownies because who doesn’t love some yummy brownies? On this recipe I took my own little spin and added few extra layers to my brownies. So that’s why I named them Slutty brownies. Trust me they taste as bad as their name.
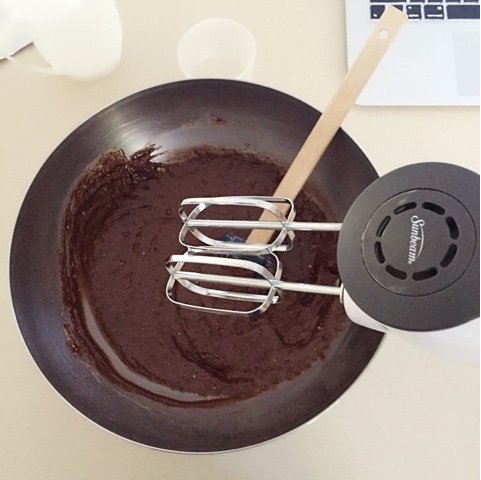
            For the bottom layer I added a thick layer of chocolate chip cookies mix, in between I added Oreo thins so they gave my brownies some texture and a bit of crunch. Then finally on the top, I spread in nice layer of my brownie mix. I usually love baking everything from scratch but for this recipe I purchased everything mixed and ready. Just because it was three layered recipe I choose to go with boxed mix. Also honestly, I have been super busy lately so for the sake of time I didn’t make it recipe from scratch. Do let me know if you guys will like me to do any new baking post.

            So let’s get started with the prep of our slutty brownies. Down below are all the ingredients that you need along with the pictures step by step and the directions. Good luck baking this delicious and gooey brownie goodness. Don’t forget to send me pictures if you try baking them.
Ingredients
For the brownie layer
1 (18 ounce) box brownie mix, prepared and unbaked.
For the Oreo layer
1 (15 ½ ounce) package Oreo cookies.
For the chocolate chip cookie layer
1 (18 ounce) roll ready-refrigerated chocolate chip cookie dough.
Directions:
1.       Pre-heat your oven to 350 degrees.
2.       Line the bottom of an 8*8 baking pan (I used a Pyrex pan) with tin foil and then spray the foil liberally with baking spray.
3.       Make the brownie layer per box instructions (without baking). Set the batter aside.
4.       Get cookie dough ready.
5.       Time to Assemble!
6.       Start by gently pressing the cookie dough into the bottom of the pan, making sure to create an even layer. (I found it helpful to use the back of a 1-cup measure cup)
7.       Then add a layer of Oreos on top of the cookie dough. Nudge them as close together as possible without overlapping.
8.       Pour the brownie batter on the top of the caramel- Oreo layer. Use a spatula to make sure it’s even.
9.       Bake for 30-35 minutes.
10.   Test with a knife to see if the center is done. It’s OK if the knife has some brownie on it. It’s easy to over-bake the cookie layer if left in the oven too long.
11.   Although you can scarf these right away (they’ll be crumbly but delicious and gooey!), they actually get better with age. Let them rest for several hours for easier handling and serving.
12.   Don’t forget to enjoy these delightful brownies with your family.


I hope you all enjoyed this baking post. Until next time, keep hustling for your dreams. Jessi, Xo.